Learn how to make liquid soap from scratch. Handmade liquid soap uses oils/fats and an alkali, similar to soap bars. But the alkali is potassium hydroxide instead of sodium hydroxide. The result is a soft soap, a soap paste, that you later on dillute in water. Learn about how to make the soap paste, dillute it into liquid soap and home tests you can do to check your final product.
Who doesn’t love liquid soap? Although a soap bar has its own charm and is zero-waste since it doesn’t need a container, liquid soap is easier and faster to foam. Then it’s a matter of preference, some people prefer soap bars, some people can’t live without bath gel and liquid hand soap.
In this tutorial, there’s no hacking soap bars or using pre-made store-bought liquid soap. This is the real stuff! You are actually opening the door to a lot of DIY: hand soap, bath gel, dish washing soap, even laundry soap,… The method is always the same, only the ingredients will change.
Table of Contents
- How To Make Liquid Soap?
- Watch These Tutorial Videos
- How Do You Make Homemade Liquid Soap?
- Phase One: Making Soap Paste
- Step 1: Gather the ingredients and equipment
- Step 2: Measure all ingredients and prepare your workstation
- Organize your Work Area
- Step 3: Starting the soap paste – melt / heat the oils
- Step 4: Prepare the lye water (potassium hydroxide solution)
- Step 5: Mix the lye water and oils
- Step 6: Stick blending your soap
- Step 7: Cooking your soap paste
- Step 8: Finishing your soap paste – Testing the soap paste
- Phase Two: Making Liquid Soap
How To Make Liquid Soap?
This liquid soap, made with natural vegetable oils and potassium hydroxide, is not only pure and of high quality, is also very economical, as a small amount of soap paste (500g) gives you easily 1,5 to 2 liters of soap. This soap is made by using a crock pot and a hot process method, but it’s not as complicated as it sounds. This tutorial will guide you through the steps.
The internet is filled with posts about How To Make Liquid Soap With A Soap Bar, where its stated is homemade liquid soap, but this is nothing but “liquidifying” a soap bar. Some recipes are even a bit irresponsible as they propose to use a commercial soap bar (usually not soap at all) and heat it, which might chemically change and alter some substances, even producing toxins in an extreme case.
As this soap can only withstand 3% of superfat (or it separates), glycerin can be added for additional moisture and glide. I personally think that the soap made with distilled water only, as a hand soap, is good enough, so the addition of glycerin is optional. You can also add scent, but, again, it’s optional.
I’ve learned how to make liquid soap with all-natural ingredients from the website Lovely Greens. The author explains everything in detail, but in simple terms, and when necessary providing a reason to do something this way and not that way. The part where you make the liquid soap does require some trial and error though, and it’s not straightforward.
I’ve really tried to simplify this process for you. This tutorial adds up my experience and simplifies the process even further. You will find a detailed step-by-step tutorial that will show you how to make liquid soap with potassium hydroxide (also known as potash). Every recipe in this blog will also have its own recipe video, but this is a complete and detailed tutorial, where you can learn all details, special tips and hopefully clear all your doubts.
Let’s not waste another second and jump to the tutorial.
Watch These Tutorial Videos
How Do You Make Homemade Liquid Soap?
What is the main difference between soap bars and liquid soap? Its the alkali substance you use. In other words, you make soap bars with sodium hydroxide (lye) and you make liquid soap, more correctly, a soap paste, with potassium hydroxide (potash).
And what is the main difference between cold process and making this liquid soap? Heating. Making liquid soap from the scratch is very close to hot process soapmaking. So, you will need a slow cooker or crock pot.
I have read a lot about hot process soap and got confused with all the details and steps. It really sounded complicated. But after making liquid soap and Rebatching Cold Process Soap (another method involving heat), I feel ready to try hot process. Some soap makers swear that after making hot process soap you won’t want to use any other process!
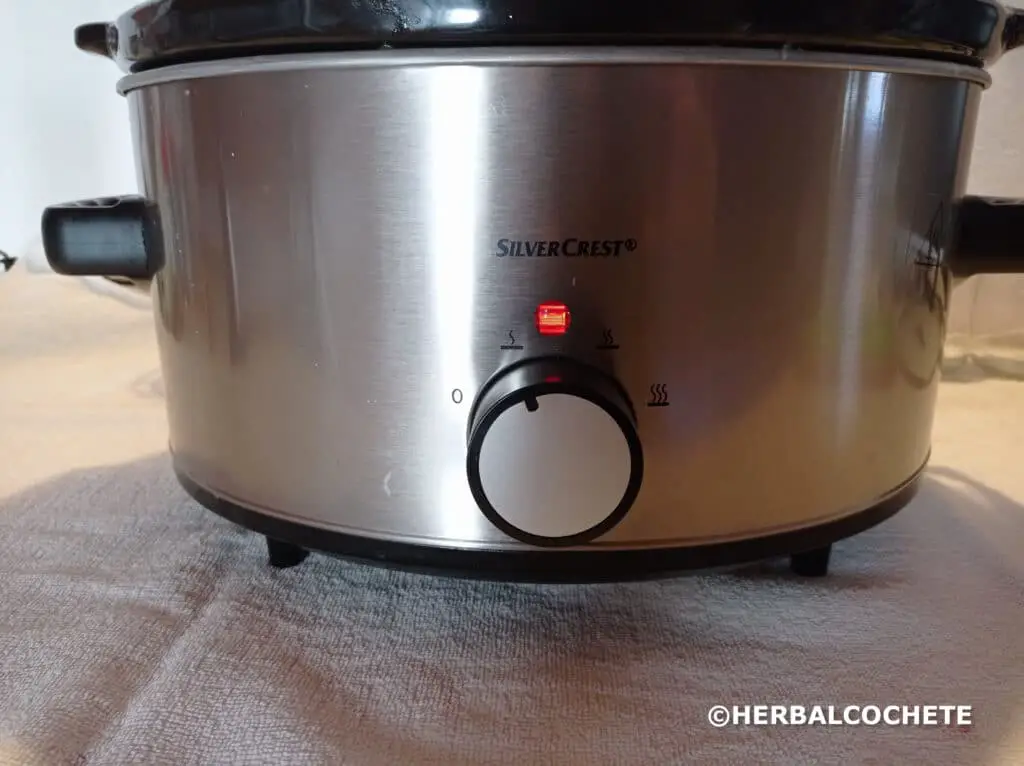
Anyway, a slow cooker is mandatory for this process, you won’t be able to check out temperature while making this liquid soap. An electrical stove and a double boiler system will also work out. But you need a system that auto-controls temperature, otherwise it will be really complicated.
Apart from that, the process requires patience but it’s relatively easy once you are able to recognize the various steps.
Similar to cold process, or any soapmaking process, it involves many ingredients and steps, and some accuracy, so it is very important to keep everything organized.
These step-by-step instructions for making handmade soap presented in this session are generic and, apart from some details, serve to follow any type of liquid soap recipe.
Phase One: Making Soap Paste
Step 1: Gather the ingredients and equipment
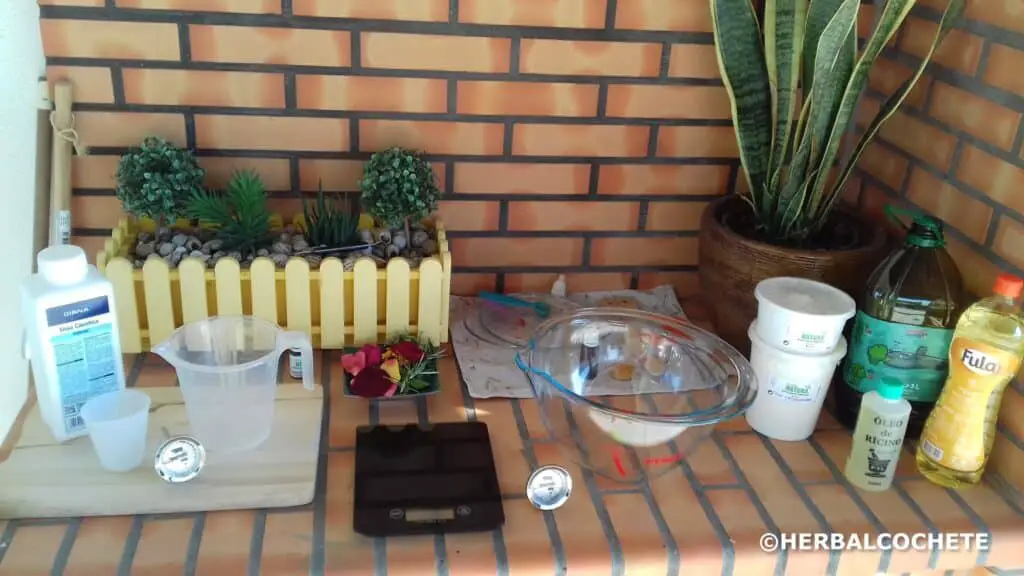
It is important to have everything prepared and organized before you start preparing the soap batter. This includes measuring ingredients, preparing your workstations and organizing equipment. Because the time factor is critical, it is not advisable in the middle of the recipe to pick up any missing ingredients or necessary equipment.
It is also not good practice to measure ingredients in a hurry, it leads to measurement errors and can compromise the quality of the final soap, for example, adding too much lye can make the soap irritating to the skin – pure lye burns your skin!
Take the time to read and understand all the steps in this tutorial, as well as each recipe. Then, prepare everything you will need for the recipe. Never failing this important preparation step is halfway to a smooth and sucessful soap making experience.
Step 2: Measure all ingredients and prepare your workstation
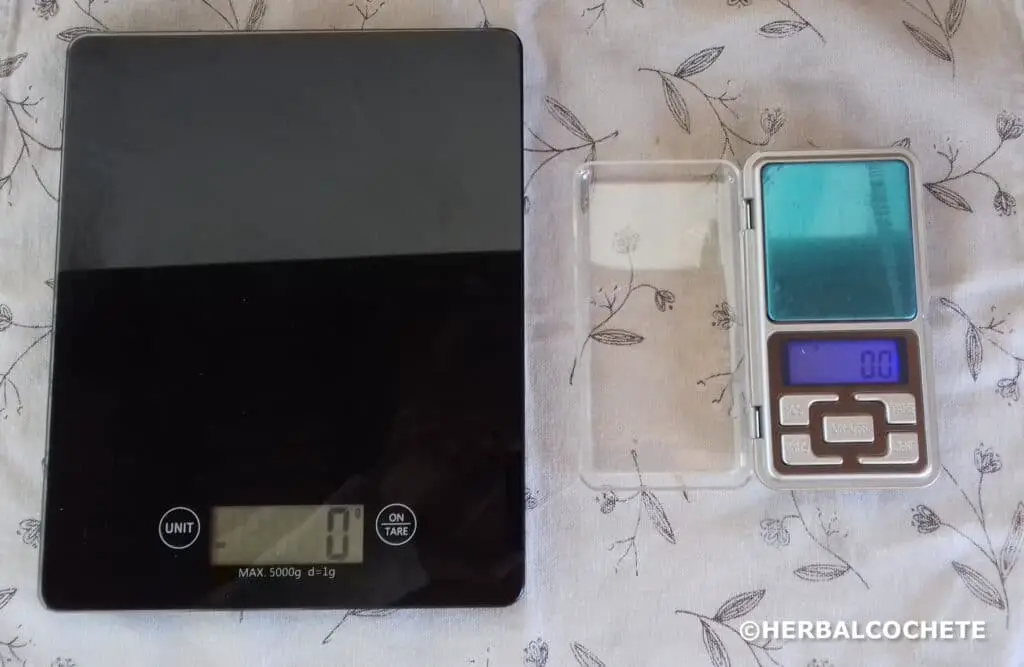
The quantity of oils and lye is critical to a good soap. It’s very important to follow the right quantities with an error close to 1 gram.
IMPORTANT NOTE: If you happen to make small mistakes, better have a little more oils and a little less lye. For example, if you are measuring 64g of lye, better to have 63g than 65g; if you are pouring some oil and you need 400g, better to have 402g than to have 398g. The calculated superfat should be able to “cover” these errors anyway. But never make or formulate soap in cups, spoons or worse, eyeballing ingredients. Always use weight.
Still, liquid soap is made in two main steps: making the soap paste, and making the liquid soap. Let’s cover preparations for the two stages.
Soap paste
Weigh the quantities of oils and butters with a scale. Being an important step, it requires some attention:
– Place a bowl or, if possible, the slow cooker container where the oils will be heated on the scale and set the scale to zero (usually the “tare” button). Then the oils are weighed one by one, taking care to “reset” the balance for each oil.
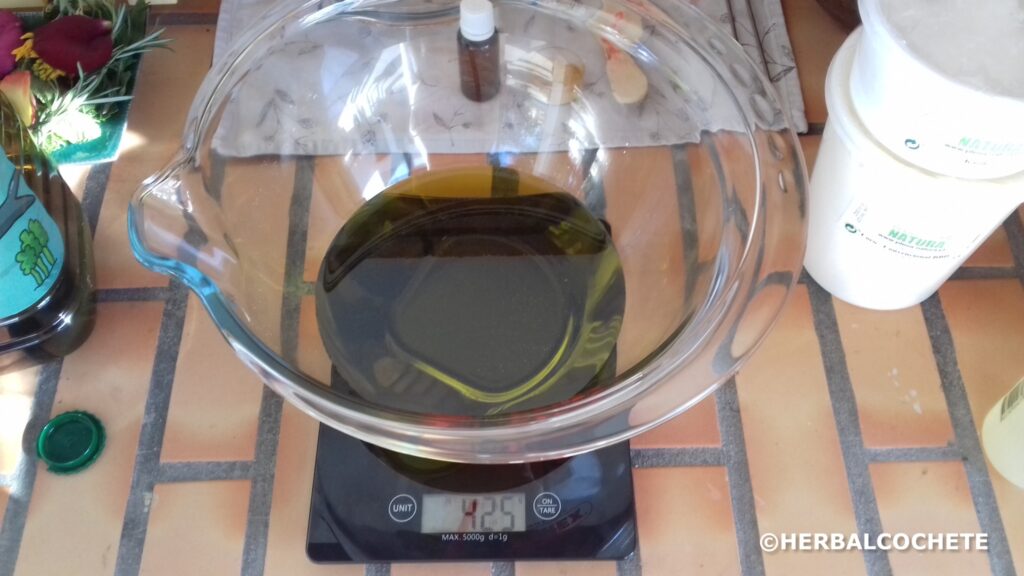
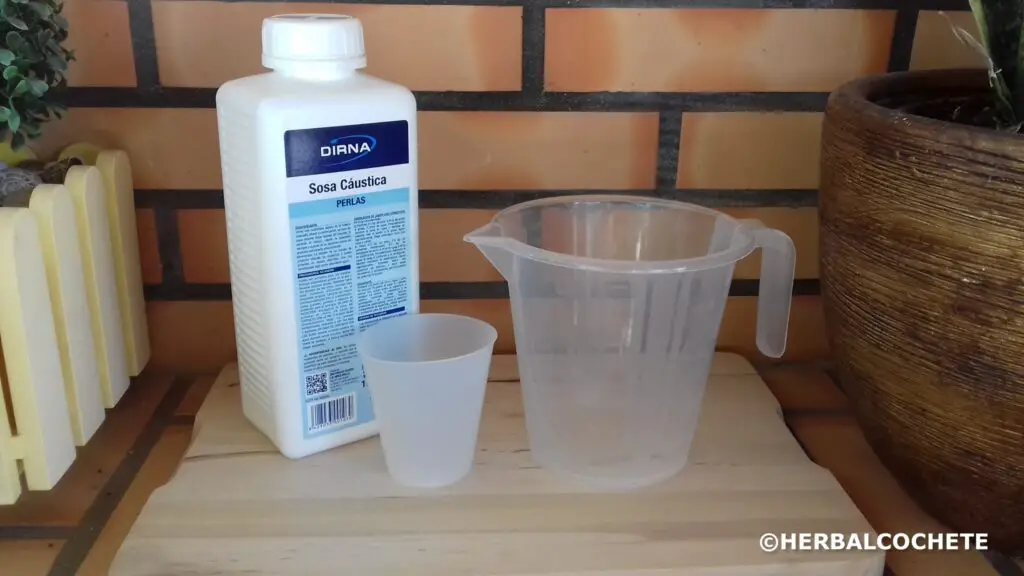
– Weigh the water and potash using a scale. Place each ingredient in a separate container: a heat-resistant jug for water, a cup or bowl for the potash.
After measuring ingredients, organize everything in workstations or work areas that must include the following utensils:
- an area to prepare the soap batter, where you should have at the ready the slow cooker, 2 spoons, 2 spatulas (you can then define what works best for you – I only use spatulas), a strainer, a plate where to put dirty items, some squares of kitchen paper and the immersion blender already plugged and prepared.
- an area to mix the water with lye. It is important that this area is well ventilated, ideally outdoors, or under a window. This area should have: a stainless steel spoon or silicone spatula, a large container with cold water to cool the lye water (potash water?) or potassium hydroxide solution.
Liquid soap
In this stage, you will need to weigh liquids for the final liquid soap, like essential/fragrance oils, water and vegetable glycerin. Essential oils or fragrance oils should NOT exceed 3% of the liquid soap amount. Apart from that, measuring ingredients at this stage is not so critical, and you can even add a “little bit” of water or glycerin.
IMPORTANT NOTE: you can use pretty much any liquid, just like in cold process, however, sugary substances like milk, herbal infusions or honey will contribute for a bacterial-friendly environment, something you want to avoid. Why? Because liquid soap uses water in its final product, unlike soap bars, that cure to lose all water content.
The amount of liquids at this stage depends a lot on how you wish to produce your final liquid soap (if all at once, or in batches along time).
– Weigh the water and glycerin using a scale. You can place each ingredient in one container (one jug).
– Weigh your dye, although is something you might not find in my recipes. I love the natural color of liquid soap: yellow to golden yellow.
– Weigh the essential oils or fragrance oils and your preservative (if you decide to use it) into a small bottle
Organize your Work Area
Organize your working areas for this stage that must include the following:
- an area to make your liquid soap. You will need the slow cooker again, a couple of spoons/spatulas and a dish for dirty items. A jug with extra water might be necessary. At the end, you will also need the small bottle with essential oils and preservative, depending on how you wish to make your liquid soap
- an area to pour your liquid soap into containers. You will need to have available your jars or dispenser bottles (wherever you decide to store your liquid soap), a bowl, a strainer, a spatula and the slow cooker container with the liquid soap.
I advise to continue reading and come back to this section later on, after reading the tutorial up to the end, as this greatly depends on how you wish to make your liquid soap. If you still have doubts, leave a comment below.
Step 3: Starting the soap paste – melt / heat the oils
Is everything ready? So let’s start making soap!
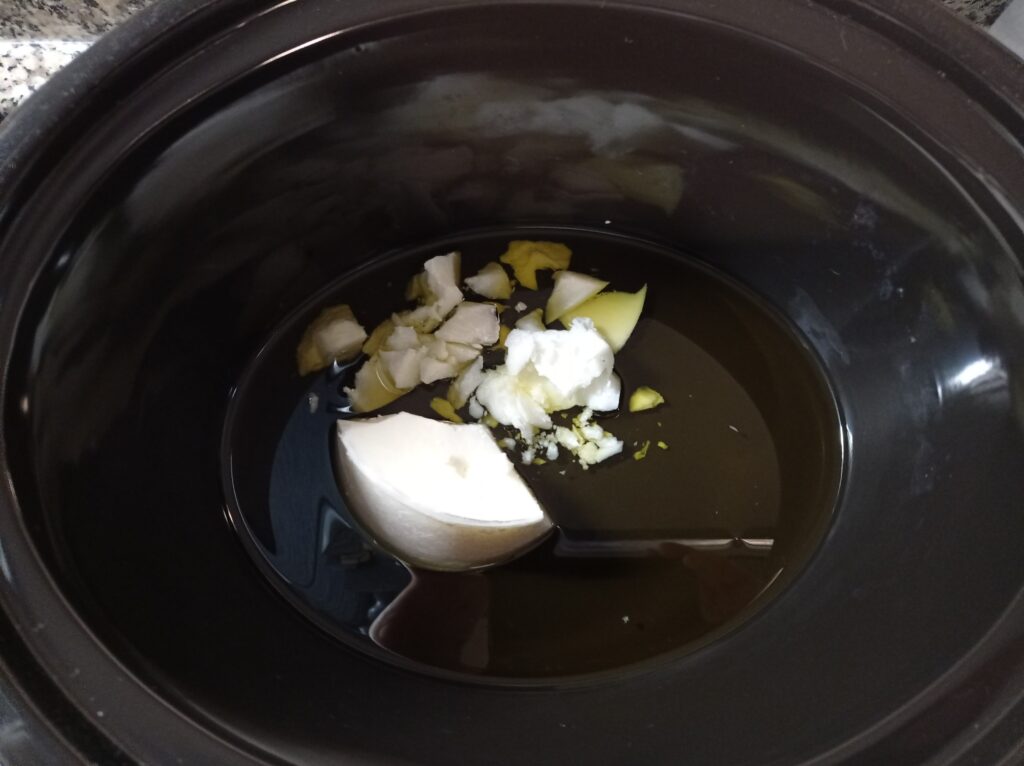
There are recipes that start by melting the “solid” oils (coconut oil, palm oil) over very low heat, and adding the liquid oils as soon as the first ones have melted. I put everything together and heat the oils until small pieces of the solid oils are left and let the rest melt out, mixing.
No need to use the microwave in this case, you can and should use your slow cooker – in LOW heat.
When small bits of solid oils are floating, just mix until they vanish.
Step 4: Prepare the lye water (potassium hydroxide solution)
Using potash can (and should) be intimidating, however it is a necessary ingredient in soap making. All soaps, even glycerin bases, are made with either sodium hydroxide (lye) or potassium hydroxide – they are a basic ingredient.
While the oils are heating up in the slow cooker (don’t let them heat up too long unattended), let’s prepare the lye water.
First, put on your safety equipment: gloves, glasses and mask if there is not enough ventilation. You must have clothes that cover your legs and arms, and shoes that cover your feet. Make sure that there are no children or animals in this area, to minimize the risk of accidents.
Now, be prepared to place the container where you will make the solution (ideally in pyrex or stainless steel) in a container with cold water or on an outdoor surface (a bench, for example). As soon as you mix the potash with water, it will reach temperatures in the order of 100ºC – 210ºF!
Do not use the refrigerator or an enclosed area to cool the mixture, because of the resulting vapors that are corrosive and toxic.
Safety first: use ALWAYS gloves and glasses at all stages of soap making, especially when dealing with potash or the lye water.
Mix water and potash
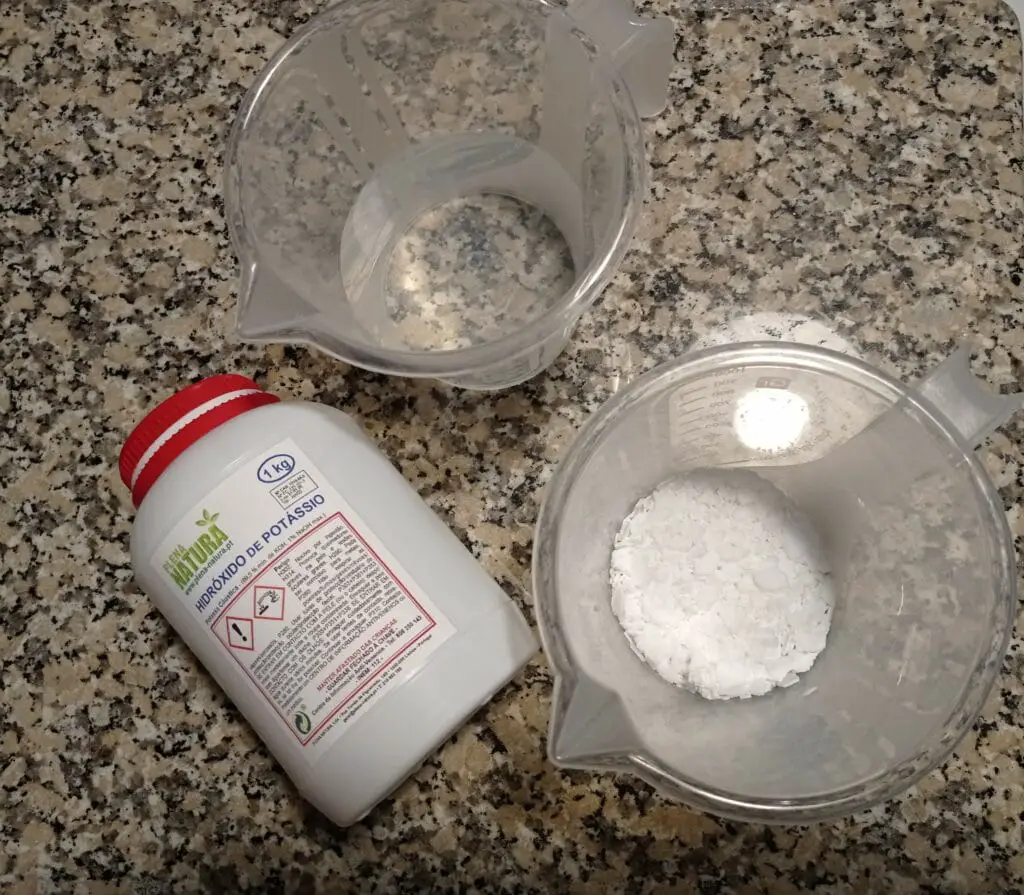
Water (at room temperature) and potash should be already measured in separate containers. The container with water, where you are going to make the mixture, must be made of pyrex, glass or polypropylene (PP) plastic, that is, resistant to high temperatures and chemical corrosion.
Slowly pour the potash into the container with the water and mix well with the stainless steel spatula or spoon. The solution will heat up and release harmful vapors, especially at this time. Be careful and avoid breathing vapors. Mix very well so that the potash completely dissolves in the water.
If you have made cold process soap and are used to making lye water, be prepared for the extra-firework – potassium hydroxide reacts stronger than lye with water, and you will probably hear a lot of efervescent noises. Just make sure that your equipment and counter is prepared for high temperatures, and keep your safety equipment on all the time
Be prudent
Note that pouring water over potash can have a really violent “volcano” effect, where you might get burned with water spilling! Always pour the potash over the water.
It is also important to ensure that the water is at room temperature (25º), especially if you are using an herbal infusion. Even if it is only lukewarm, the “volcano” effect can be dangerous.
In the meantime, I’ve felt the need to write a post focused on preparing the lye water alone: How to Make Lye Water. See the simplest way of making lye water, although you can add colorants or addictives to it, depending on the recipe.
Lye water made with potash (should we just call it potash water? :D) is basically the same, apart from a sightly stronger reaction with water.
Step 5: Mix the lye water and oils
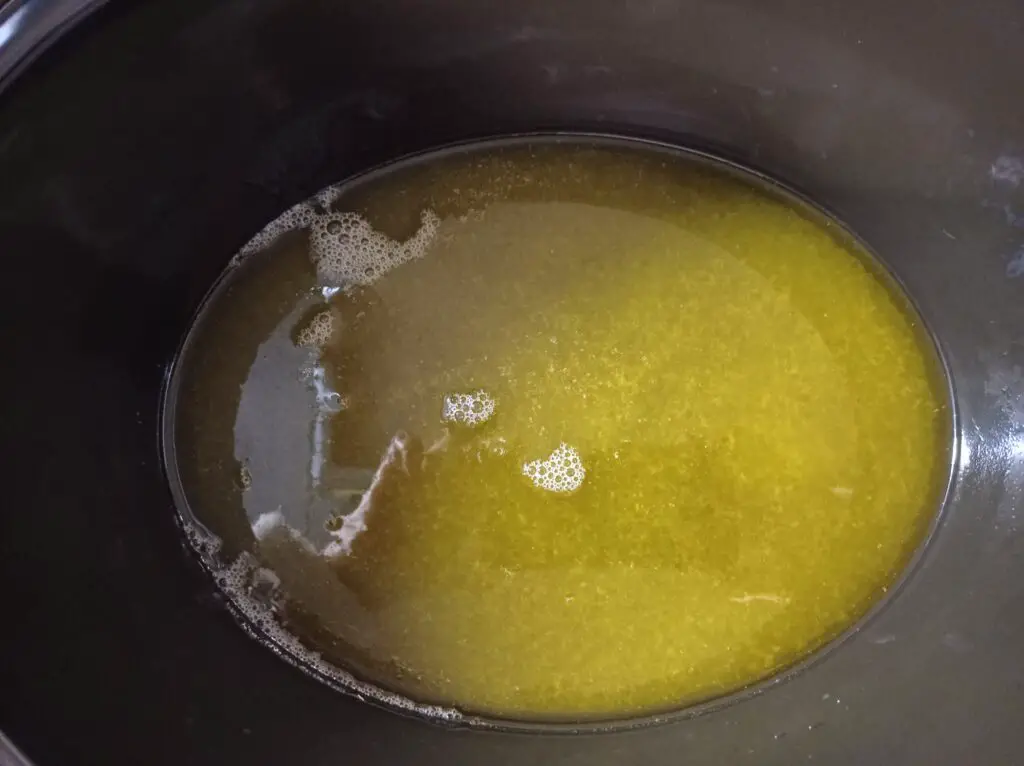
Keep your oils inside your slow cooker, and the heat set to LOW. Using a strainer, strain your lye water into the oils carefully and avoiding spillage of any sorts – you do have your gloves and glasses on, right?
Be careful will spillage: my slow cooker is aluminium in its outer structure and it has a nasty stain from lye water spilage and dissolving the aluminium afterwards… It was not more that a few drops.
Is lye water and oils temperature important like in cold process?
Nope, not really. I always let the lye water to cool down a bit, and I never allow the oils to heat over 60ºC (they change with high temperature), but from what I’ve read is not critical like in cold process.
Even if your lye water goes down to room temperature, I think you can still make the soap with no issues, the process with the stick blender might just take longer.
Sugars
You can use milk, herbal infusions, honey or sugars, just like in other soapmaking methods. However, liquid soap contains water in its final product. Water and sugars (even herbal infusions are a sugary environment even if not sweet) make for a good and friendly bacterial environment, and the usage of a preservative is mandatory. Before you have some experience, I would stick to plain distilled water – the soap is great even if simple.
Step 6: Stick blending your soap
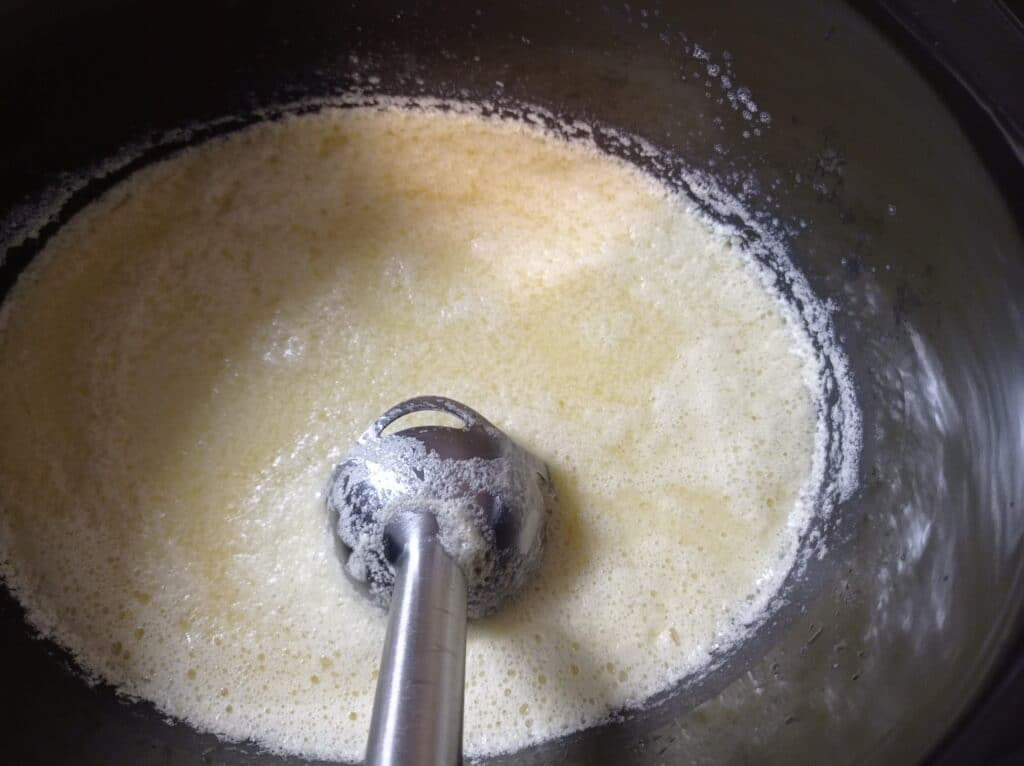
Now the interesting part will begin! Be ready for different stuff, even if you are experienced with cold process. There’s not really a “trace” phase here, as the soap will turn from liquid to solid almost instantly.
Set your slow cooker to HIGH heat, and insert the immersion blender into the mixture and tilt it to release air bubbles. Turn on the blender for very short periods of time and then mix it up a little, using it as a spoon. The mixture will slowly stop being “oily” and start to take on a more milky and opaque consistency, especially when you switch on the blender.
Now, let’s cover the different phases:
– your soap batter with start to emulsify, turning into a whitish, mayonnaise-like substance, especially in the zone where you stick blend;
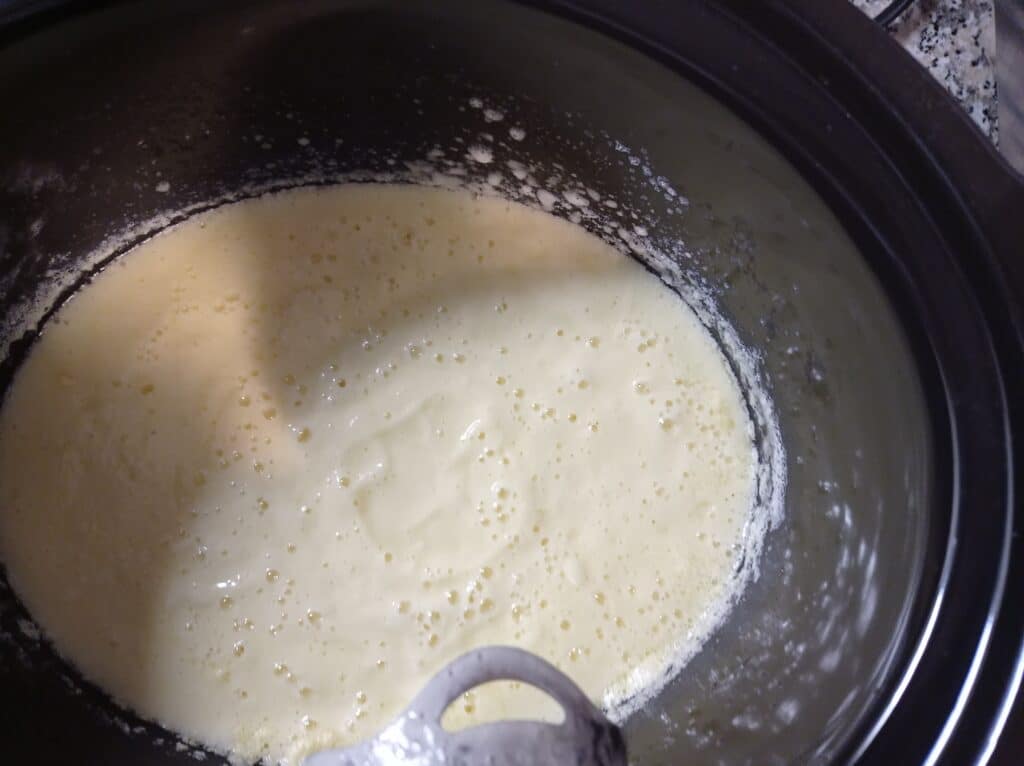
– after a while, the soap batter will almost all be emulsified, but with oils floating, looking like it wants to separate – it will not be fully homogeneous;
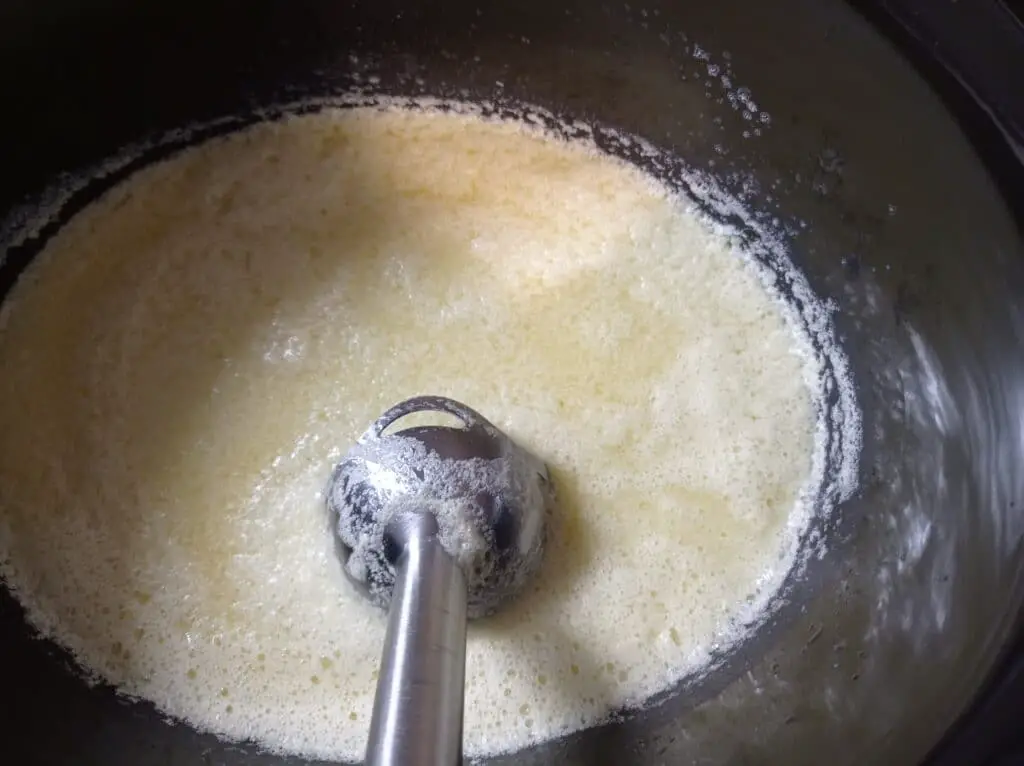
– Run the process of stick blending and mixing for 5 to 10 minutes, then let the soap rest and heat for 5 minutes. Keep doing this for around 30 minutes. The soap batter will thicken a little bit but apart from that will remain the same – like it’s separating. This is normal.
– At some point, the soap batter will instantly seize, whether you are stick blending or letting the soap rest and heat. The looks will be similar to solid pudding. Stick blend and mix while you can.
– When stick blending becomes very difficult, mix with a large (and strong) spoon. Your soap batter will turn into something very similar to mashed potatoes. Just mix it so it won’t burn or stick.
Note: If you do not use an immersion blender, and choose a hand whisk or spoon, I have no idea how long this will take….. Hence it is essential to use the immersion blender
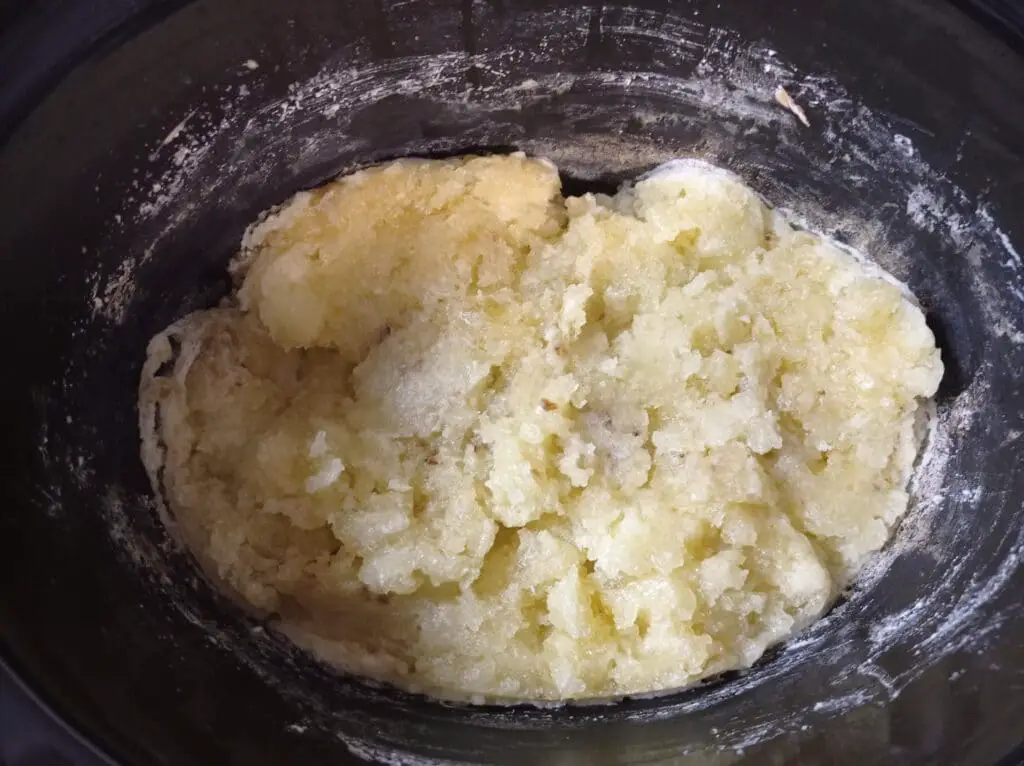
Step 7: Cooking your soap paste
After you reached the “mashed potatoes” stage, set the slow cooker to LOW heat. Now, you just need some patience. The soap should remain in low heat for around 6 hours. Mix the soap paste every 30 minutes, in order to keep it from burning or sticking to the slow cooker.
After 6 hours, turn the heat off and let the soap paste cook in its residual heat (preferably overnight). This time should be enough to completely saponify the soap paste.
Along the cooking period, the soap paste will turn from mashed potatoes to a translucid substance, like yellow-amber vaseline.
Step 8: Finishing your soap paste – Testing the soap paste
Liquid soap making is trickier than cold-process soap making because we are using potash instead of caustic soda. With potash being only 90% pure, it can cause your soap to be lye-heavy, and harsh on the skin, or overly superfatted and cloudy. You can have everything measured correctly and this can still happen because of the lye’s 10% of other substances. That’s why testing your soap is very important, and unfortunately, it needs to be done for every batch of liquid soap you make.
Testing superfat
After the soap has finished cooking, stir a teaspoon of soap paste into half a cup of scalding hot distilled water. Let it sit and dissolve, giving it another stir if it needs help breaking up. Let it cool completely then have a look.
If there’s oil on the surface, or if the liquid is milky and opaque then you still have unsaponified oils in the paste. Set the slow cooker to LOW heat and continue cooking the soap paste it until it’s much clearer.
Just to be clear, milky means you can’t see through it at all. If you have a translucent liquid then the soap paste is ok.
If your liquid soap is milky it means it has too much superfat, so anything more than 3%. It can cause all kinds of issues after adding your essential or fragrances oils, being the most common soap separating afterward. Also, too much oil can separate anyway and float to the surface, after you dilute the soap paste in water.
Testing excess of lye
Testing pH and its usefulness in soapmaking is another quite controvertial subject. To such extend that I’ve decided to make a dedicated post about it later on. So, I am not going to extend myself much further.
You can test for excess lye by two ways:
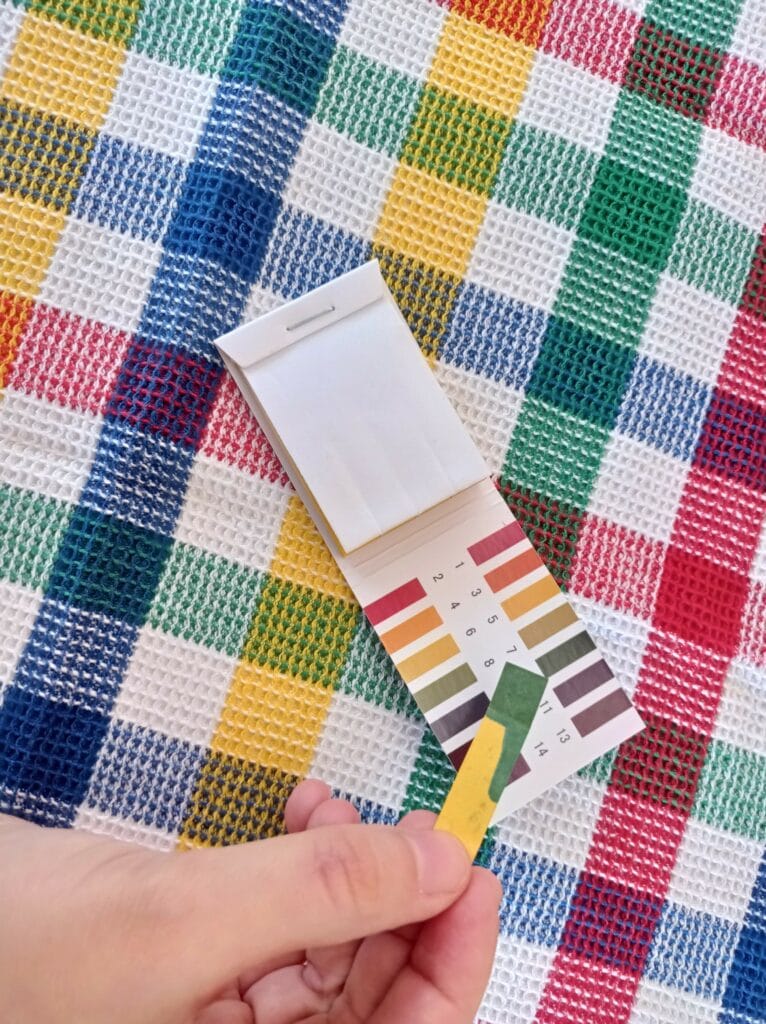
Checking its pH
Dilute 1g soap paste into 99g of scalding hot distilled water and let it cool to room temperature. Take the pH strips (Litmus test papers) and check to see if the soap is between 9-10. Allow the paper to dry completely for the most accurate result.
Liquid soap is supposed to be alkaline, but if its pH is above 10 then your soap is lye-heavy. However, do not take this testing too seriously, as pH strips may have a wide range of variability – meaning that before throwing your soap away, adjust down pH, just in case. Find here further information on testing liquid soap.
You can also crosscheck with the test below.
Zap testing your soap
This one is quite tricky, as you test soap with your tongue. First of all, DO NOT use your tongue directly in soap to run this test. Instead, do it as per the SoapMaking Forum sticky post.
If your soap is lye heavy – pH at 10 or it zaps in your tongue – lower its pH by adding diluted citric acid in the next stage – making the liquid soap – but don’t go below 9 or it will destabilize. Start with 1/2 teaspoon of citric acid diluted in 1 teaspoon of distilled warm water (or a bit more, just to dissolve the powder).
Your soap paste is ready!!
Your soap paste has a shelf life of 1 to 2 years, depending on the shelf life of the oils used. Consider the shelf-life of your paste to be the closest “best by” date of your oils. If you plan to store it, use a airtight, disinfected container. You can use it liquified as liquid soap (the most common) or you can use it as-is, as a paste.
Phase Two: Making Liquid Soap
This phase is simpler than it looks, but filled with “if’s”. Meaning that you have a lot of freedom to do things your way, but on the other hand… it’s not straghtforward. I’ve decided to make a table to help you decide the best way for you (see below). This is more a matter of personal taste than anything else.
Dilution rates for liquid soap
The recipe I followed at Lovely Greens uses water and glycerin to dilute the soap paste. It also uses 100g of liquids (80g of water and 20g of glycerin) for 100g of soap paste. This is a 1:1 ratio.
I’ve actually found rather difficult to dissolve all the soap paste using this ratio – soap took forever to dissolve -, therefore, I have increased the amount of liquids from 1:1 to 1:2 and later on 1:3. I’ve also made soap with and without glycerin and the difference is not noticeable, so, as a personal choice, I’ve decided to add only distilled water.
If you wish for a thinner soap – thinner doesn’t mean less quality – you can start with 1:3 dilution ratio. Why would you want a thinner soap? Well, we are almost “programmed” to use 1 to 3 pumps of a soap dispenser to wash. You won’t use less than that just because your soap is more concentrated.
About preservatives
Using a preservative in liquid soap can be a personal choice, but in my opinion, is a “must-have”. I’d hate to use handmade soap wondering if it’s full of germes / fungus or not…. The rule of thumb is if your soap pH is 10 or above, no preservative is needed, below 10 you will want to consider a preservative. The lower the pH, the more hospitable the environment for microorganisms growing in your soap.
You also need to consider any sugars (milk, tea, beer, honey, etc.) that you add to your soap. I’d advise you to not use them. Many additives are considered “bug food” and will increase the likelihood of those undesirables developing in your soap. Even with a preservative, these ingredients will increase the chance of things developing in your soap that you don’t want in there.
The two preservatives that have been recommended for use in liquid soap are Suttocide A and Liquid Germall Plus. You use Liquid Germall Plus in this recipe, I believe to be the safest one.
Vitamin E, Grapefruit Seed Extract and Essential Oils are not preservatives and will not deter the growth of bacterial, mold, yeast or fungi. More information about preservatives in personal care products can be found here: http://www.makingskincare.com/preservatives/
Adding scent
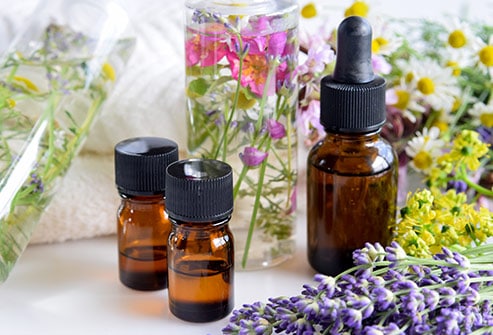
You can add scent to your liquid soap at the end: essential oils or fragrance oils (or a mixture of both). Unlike cold process, they won’t lose strength, as the soap will be completely finished when you add them, so you can use pretty much anything you wish.
They will give your liquid soap a pleasant scent, but they are completely optional. If you have sensitive skin, you might consider skipping them. They might also cloud your liquid soap (from transparent to cloudy or “foggy”). If it fogs, let the soap set for a few days, usually it goes away.
Use a maximum of 3% of essential oils/fragrance oils of your liquid soap.I only use 1% as the liquid soap gets a nice scent… and I save some $.
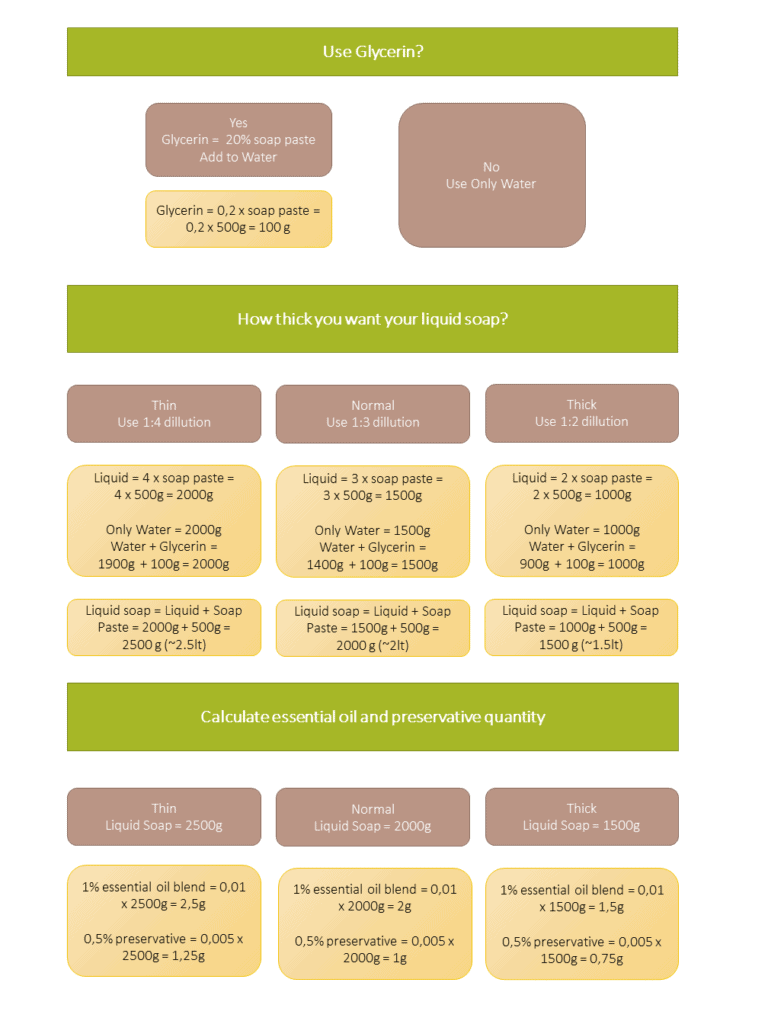
The table below will help you to calculate ingredient quantities for this phase, according to your preferences. You can choose or not to use glycerin, and you can choose one of 3 dillution ratios: 1:2 (thick soap), 1:3 (“normal” soap) and 1:4 (thin soap). Essential oils and perservative quantities are also calculated. To simplify, this table considers 500g of soap paste.
Step 9: Starting your liquid soap – Measuring ingredients
Follow the table above to get your quantities. But don’t fret too much to get all quantities right, at this stage they are not that important, apart from essential oils maximum usage of 3%. All the quantities presented below are more guidelines to make your liquid soap. If you’re not sure how to start, start without any glycerin and “normal” thickness (1:3 dillution). In this case, you should have:
- Soap paste: 500g
- Water: 1500g
- Essential oils (total): 2g
- Preservative: 1g
Preservative here is considered to be Liquid Germall Plus, that uses a dosage of 0,5% of product. Other preservative brands may follow other dosages. Make sure you follow the manufacturer recommendations. Essential oils percentage used is 1%.
Measure the water and glycerin according to your preferences, and pour them into the slow cooker. Measure the remaining addictives as well (essential oils/fragrances and preservative), but keep them in a separate bottle or cup.
Step 10: Making the liquid soap
Turn on your slow cooker and set it to HIGH heat. Fill it with your liquids and let them heat near boiling temperature. Pour the soap paste into the slow cooker and mix gently. Let all ingredients warm up for a while, then turn the heat to LOW. Leave the mixture like that for 1 hour, gently mixing every now and then, and gently squish existing bits of soap paste floating around.
Turn the heat to HIGH again, mix a while to break the chunks of soap paste, let the ingredients warm up, then set to LOW again, letting the soap rest for another hour. If it looks like there are just too much soap paste undissolved, and you don’t see it reducing hour by hour, add more water. Repeat this process until most soap paste is dissolved and you see only small bits floating on the surface. This part does require patience and some trial and error.
After that, turn off the heat and cover the slow cooker. Let it set in its residual heat for several hours, or overnight preferably.
At the end, once completely cooled, your soap should be overall liquid and homogeneous, transparent and usually with a golden yellow color (but that depends on the oils used). Some small chunks of solid soap are still expected, but hopefully all is dissolved by now.
Step 11: Adding the addictives
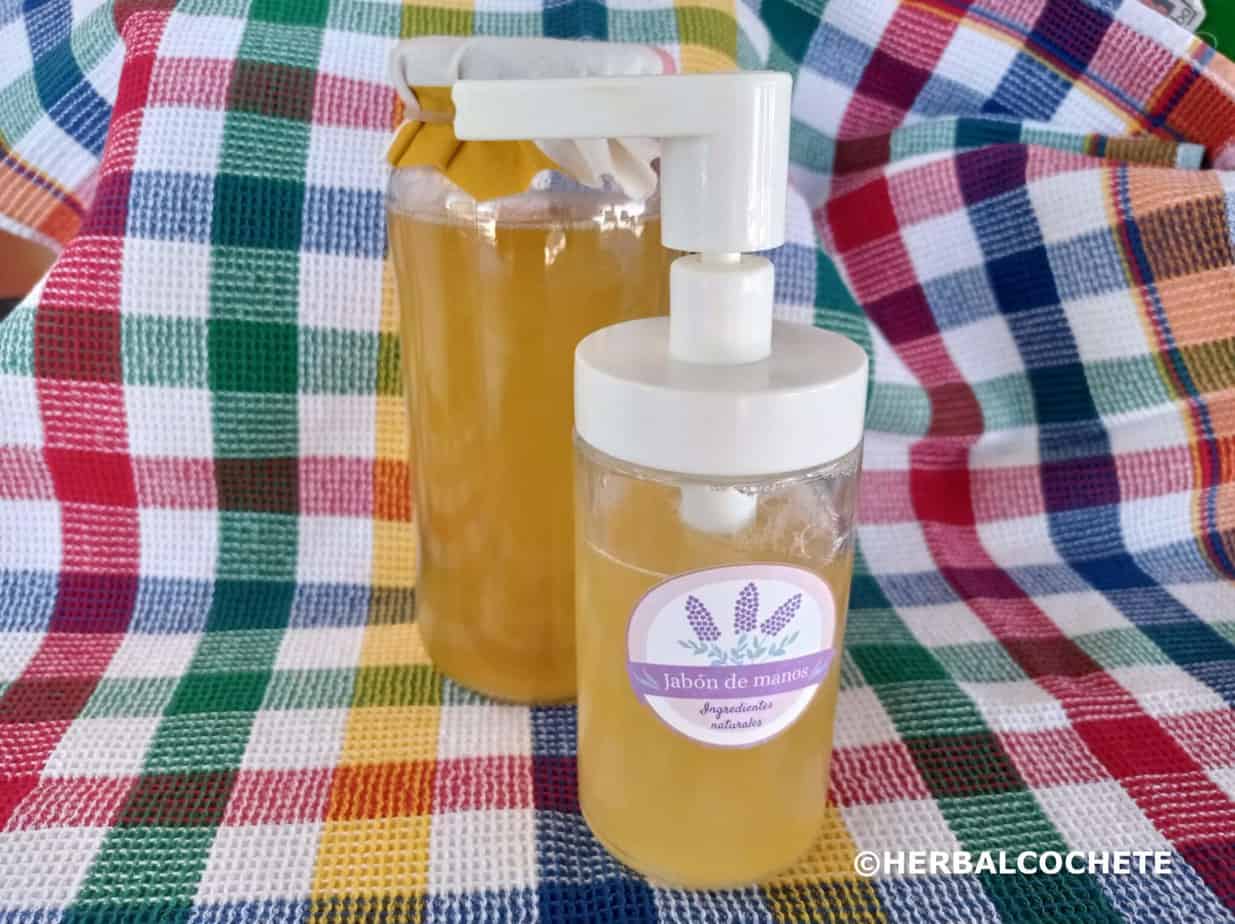
Strain your liquid soap into a bowl to catch any left chunks of soap paste. Add the fragrances/essential oils and the preservative. Mix well and pour your liquid soap into pump dispensers for immediate usage or jars for storage.

Cloudy soap
It’s usual that your soap looks beautiful and transparent when it’s still hot, and once it cools down to room temperature, or when you add your addictives, it gets cloudy or opaque. This can look like little droplets of white, white streaking or ghosting, general cloudiness or a completely opaque soap.
This is due to the cloud point temperature being relatively high. It greatly depends on oils used, addictives used and it’s hard to control, as there are many variables. There aren’t two formulas that behave the same way. This article states that the simpler the ingredients with the fewest additives, the lower the cloud point temperature – fewer ingredients to precipitate out of solution. This doesn’t affect the soap quality, only its looks.
I hope this soap making tutorial has been helpful! If you have any questions, please use the comments section.

Actually the first time I saw a post like this. Little did I know that liquid soap could be made at home. But I knew that soap could be made at home. I never thought liquid soap could be made so easily. I will definitely try this. Thanks a lot for this post. This is a very valuable post. Looking forward to more posts like this.
Hello Pasindu Dimanka, thanks for your comment.
Yes, liquid soap is just a little bit more complicated to make than cold process soap, and very similar to hot process. With a crockpot or a slow cooker, you can make any of these soap processes at home, easily. You just need to gain some experience in recognizing the stages. But even if you don’t do it fully right the first time, usually you can use the soap, one way or another.
Just wait for some recipes on my website or try one already online (but don’t be mistaken this is making soap from scratch, there are a lot of recipes teaching how to make soap with a soap bar, or already made liquid castille soap – these are not the ones you want to try).
Happy soapmaking 🙂
Cheers,
Sofia
This is fantastic. You mean I don’t need to break into a liposuction disposal like in the movie Fight Club? However, the need to wear glasses and gloves makes me feel like Tyler Durden 😉 Learning this is a useful survival skill, however, it seems like a bit of a process. I am going to try it and if it proves a success I hope to organise a group learning session.
Thanks again
Hahaha Coach JC, I was completely forgotten about that Figth Club refference!! Well, you can make soap with human fat, for sure, but it’s not really needed, lol. Available vegetable oils are pretty much enough!! You can however, make soap with lard or tallow, check this recipe out – Snatch??
Anyway, you need to wait for a recipe on my website, or try one already available online, this is just a generic tutorial with no ingredients quantities 😉 But yes, soapmaking is really fun and entertaining for a group learning session. If you have any dificulties making liquid soap, let me know!!!
Thanks for the really fun and yet very kind comment.
Cheers,
Sofia